So.....I'm back to regular blogging! :) Yippee!!!!!
Well Christmas has proved one thing - we are all completely and utterly 'addicted' to our blogs. Whether we be writing them, or reading them. We are 'addicted!'. So Welcome back everyone!
First of all may I say thank you to Kate, Kim, Alison, Alhana, Karin for wanting to share in my Charity project for this year. If anyone wants to know anything about it, please go to the 2nd January post. Thanks friends.
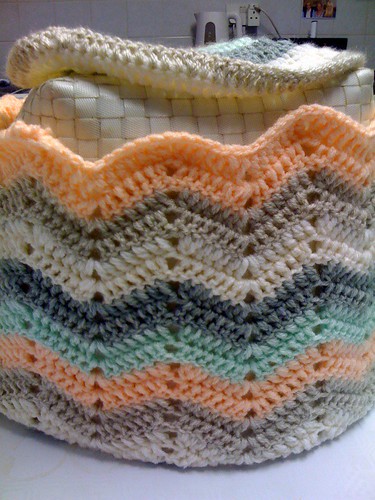
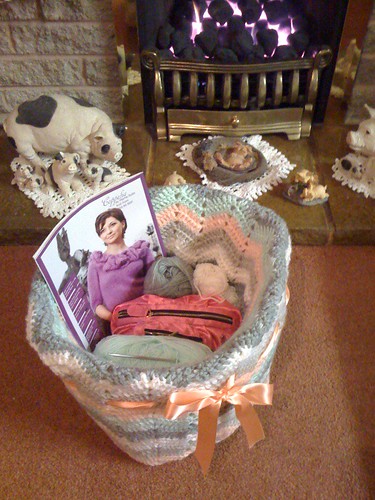
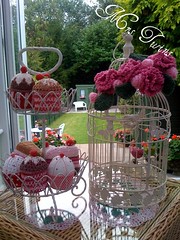
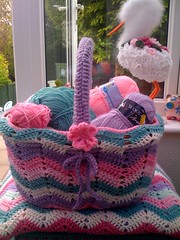
Well before Christmas I finished a project. I kept it quiet because we were all so.....busy with Christmas preparations. Getting those Christmas gifts finished ready to give our friends and family was quite a rush for a lot of us. Well now we have all that finished with I'll show you, or should I introduce you to My 'Fireside Basket'. I know yet another Basket, but it is so useful. I call it a 'Fireside Basket' because I keep it at the side of my sofa by the fire with my wool, hook case and magazines in. It's so handy just to throw everything in to (at 3.am in the morning sometimes for a quick tidy up!). ha.ha. Of course I have the Basket upstairs for my towels, then there's my Yarn Basket in the Conservatory. Find me a Basket and I'll cover it!! I just love making everything prettier than it was before. Here goes.......
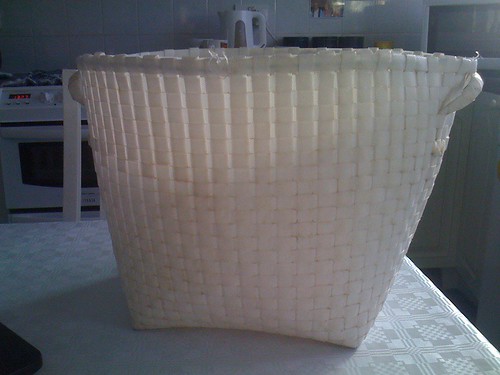
Take one old grubby linen basket.
Crochet a Ripple. Just like you would do for a blanket, but wide enough to fit round the Basket snuggly, not loosely.
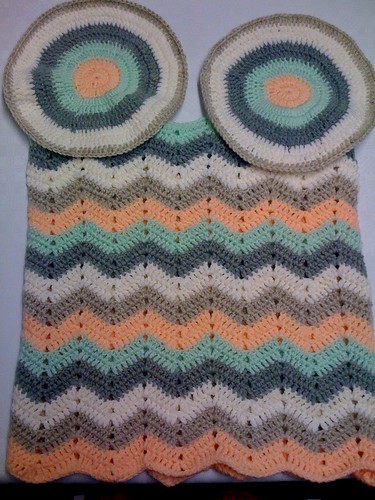
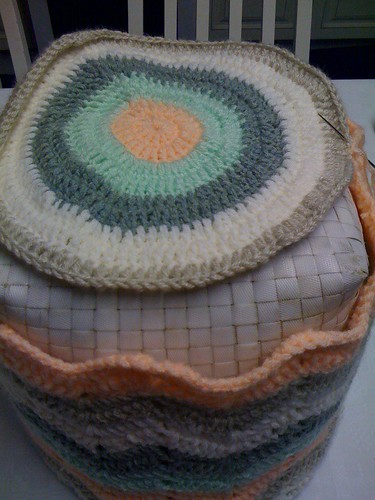
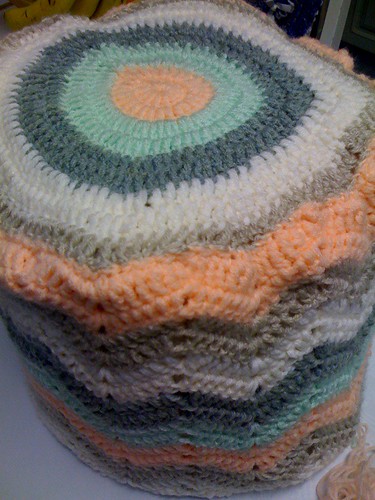
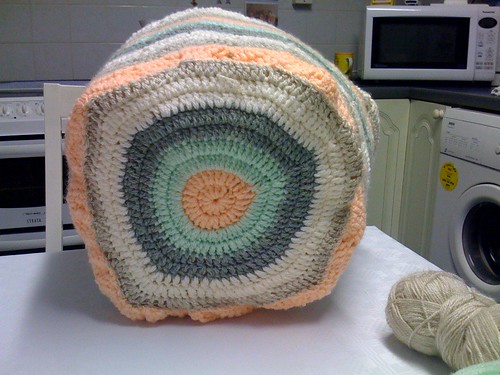
Two circles of trebles, one for the inside base, one for the outside base. The rectangle Ripple should be deep enough to fit up the outside and then folded over at the top to then go down to the bottom inside base.
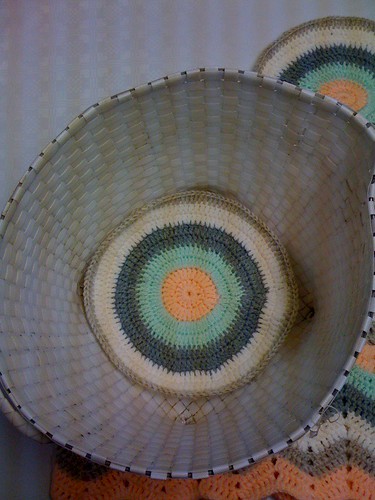
Here's the circle of trebles for the inside base part.

Here's the circle of trebles for the outside base part. The rectangle Ripple when crocheted deep enough, should then be sewn at the two edges. This forms 'a tubey' my naming!
The 'tubey' is pulled up the sides of the Basket and then folded over at the top. Then the outside base part is sewn together with a large darning needle.
Here's the outer base part now attached to the 'tubey' part.
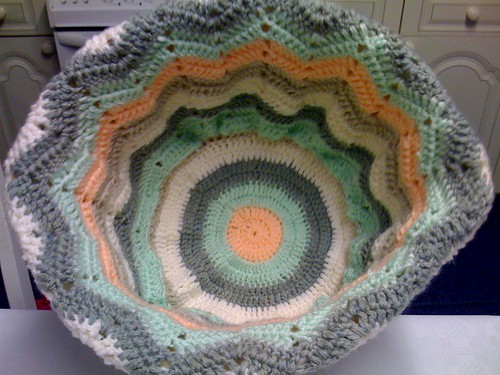
Then you do the same for the inner base part. See how the Rectangle is wide enough to reach down to the base.
Here's the base finished.
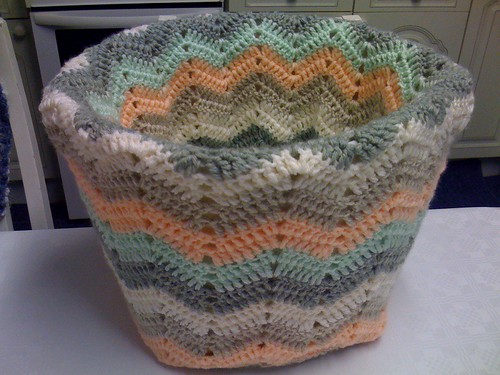
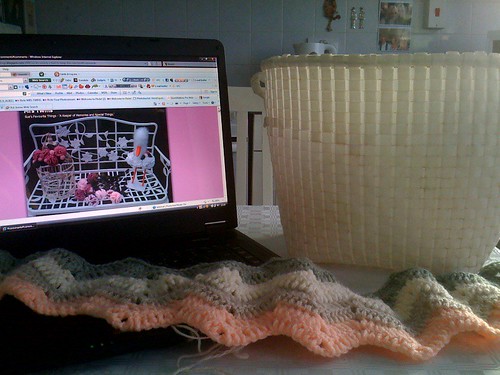
The Basket is finished. Both bases are now sewn to the main part of the Ripple.
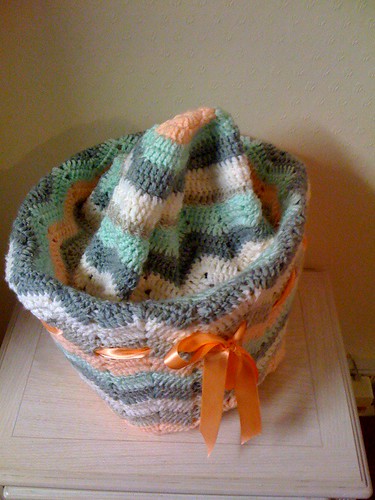
I've pulled up the inner base so you can see how it's attached. Then it was ready for the pretty ribbon which I made into a bow.
Introducing.......Ta dah!!!!!!! My 'Fireside Basket'.
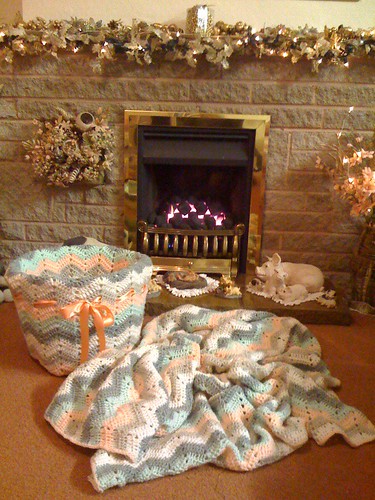
Of course it matches the 'Fireside Ripple Blanket'.
Hope I've sort of explained well enough.
Thanks again for helping me with my project.
Speak to you all soon.
My Slideshow is of my 'Fireside Ripple Blanket'.


What a way to start the New Year with a fab Ta-Dah... At first, I thought you made the basket...then scroll down to see the Unbelieveable "Fireside Basket". Perfect name. Love it. I want one. You are getting so good at getting these things all together and matching.
ReplyDeleteNow, about those hubbies and the "Not again", I've had four day inside with it being only a high of about 4 out, with him home. I am so ready for tomorrow morning at 738 when he pulls out of the driveway back to work. But, the worker are back at it around 800am. So, I might be scarce on the blogging this week. Did just swift up the new yarn today, so I do have some pictures of that. Hope to get posted in the next day or so.
So, what do you have up your sleeve next? You really have done a lot this past year. I value your blogging friendship so much. I know we both have a lot of similar friends, but have gone each in our own direction some what. But you will always be my first follower and the one I check on daily.
Icks.... I hear him coming upstairs....Better run, before caught again.
Hugs,
Kate
Oh I am *drooling* hehe that is so cute!! And a matching blanket oh my that is just lovely indeed!! Beautiful colors I always like the colors you choose ~Great Job!!! ~Blessings Heather :)
ReplyDeleteI love how you cover these baskets! I am going to have to try one. I have been busily working on a ripple afghan because you put me in the mood. I loved reading about your grandma in the last post. She sounds like such a dear woman. Have a great week! Twyla
ReplyDeleteThat was quick. Very ingenious too. Looks like it all matches and fits in well. Clever girl!
ReplyDeleteWell I've cleaned up so tomorrow I can go off in search of a lining material for my bedroom quilt which is then ready to go off and be machine quilted. I'm quite excited as it is my first patchwork quilt. Now I have to get started on the pillow covers to match the quilt. It's great to have a project on the go.
Cheers
Helen
Sue!
ReplyDeleteYou are faster then the speed of light!
(don't know if this is correct English, but I think you understand).
Very clever how you made this cover!
I received your mail. Thank you. This evening I will sort out my bits of yarn and start a square....
~X~ Karin
Oh that is really pretty, I was just looking at wicker baskets in the shop yesterday and saying that they catch so much dust, but that is a good idea to cover them and so pretty and warm looking-love it!
ReplyDeleteAll things nice...
Great tutorial, Sue! Now everybody can make their own rippled basket. :-)
ReplyDeleteI love the ribbon. It's the perfect touch for a 'finished' look.
Maybe you should add a link on the side-bar to this post and hopefully many other tutorial posts.
Happy 2010....and best wishes to you and your family.This priject it is a wonderful idea to recicle those old little things we have around the house and wants to trah them.We can make them look a lot better and just making a cover.Thanks for the spectacular idea.Never thaought about it,you are awesome.Love all your zigzag projects.Have a nice week.
ReplyDeleteHugs ,
Luna
Happy 2010! Love your newly covered basket. Such pretty colours! I'm determined to tackle more crochet projects this year, starting off with a ripple banket for our first grandchild (a little girl) due in May. You have such a pretty blog! Ros
ReplyDeleteQuestion Sue, I have always wanted to make a circle afghan like the bottom of your basket. Do you know of a way to join them without putting them in a square? It would just be so lovely to only have circles. Very modern! So happy you are back to blogging! Have a lovely week! E
ReplyDelete